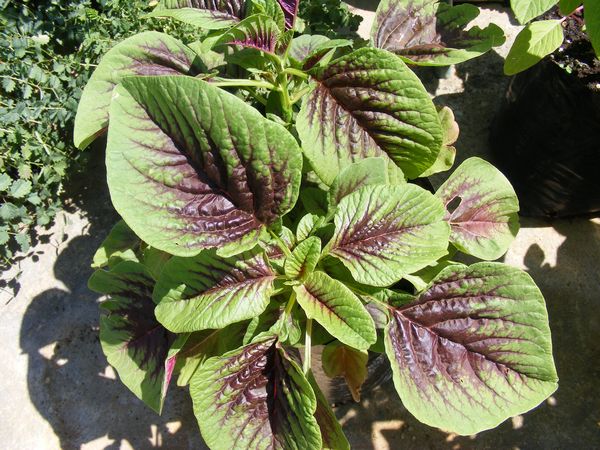
Amaranth is a cousin to quinoa and is usually grow for its delicious and very nutritious greens! Primarily considered a grain crop, amaranth produces small, nutty-flavored seeds, hence why it's compared so much to quinoa. But, unlike quinoa, amaranth also produces delicious leafy greens which are delicious to eat on their own or sauteed, much like spinach! If you'd like to learn how to grow amaranth, keep reading to find out and get the most out of this ancient grain and herb!
Amaranth greens are usually harvested young to be used in salads and sandwiches, while larger, older leaves are used for sautees, steams, and braises. Basically, any recipe that calls for spinach can be swapped out with amaranth! Keep reading to learn how to grow amaranth!
How to Grow Amaranth in The Garden

Planting Amaranth:
- Plant in an area that will receive at least 6-8 hours of sunlight per day.
- Amend the soil with compost or manure.
- Amaranth grown as a green requires more nitrogen, so plant to add a little bit of bloodmeal or conttoseed meal onto the prepared area. Be sure to not add too much though (just a handful will suffice), otherwise you'll get wilted leaves.
- Plant in mid to late spring, or once the soil temperatures have reached 68F (20C).
- Spread the seeds onto the soil and lightly rake them in.
- Water the seeds in and continue to water once a week, about an inch each time.
Harvesting Amaranth:

- The seeds will usually sprout within 7 to 14 days.
- Tiny sprouts can be used to microgreens, but for a bigger production allow the plants to reach 1-2 feet before fully harvesting.
- To harvest young amaranth leaves, cut the entire plant a few inches from ground level. This will ensure that another production of amaranth will happen.
Like this post? Share and Pin 🙂


